
Connect Cursor
Configure the MightyAI remote MCP server in Cursor and verify account access.
Use this MCP setup when a MightyAI plugin is unavailable for your Cursor setup.
Cursor supports remote MCP connections. MightyAI sign-in must also work with your client version. This guide is a configuration path, not a claim that every Cursor surface has been verified with MightyAI.
Add the server
In Cursor, open Customize from the sidebar.
Select MCPs. Find New MCP Server → Add a Custom MCP Server below your configured servers.
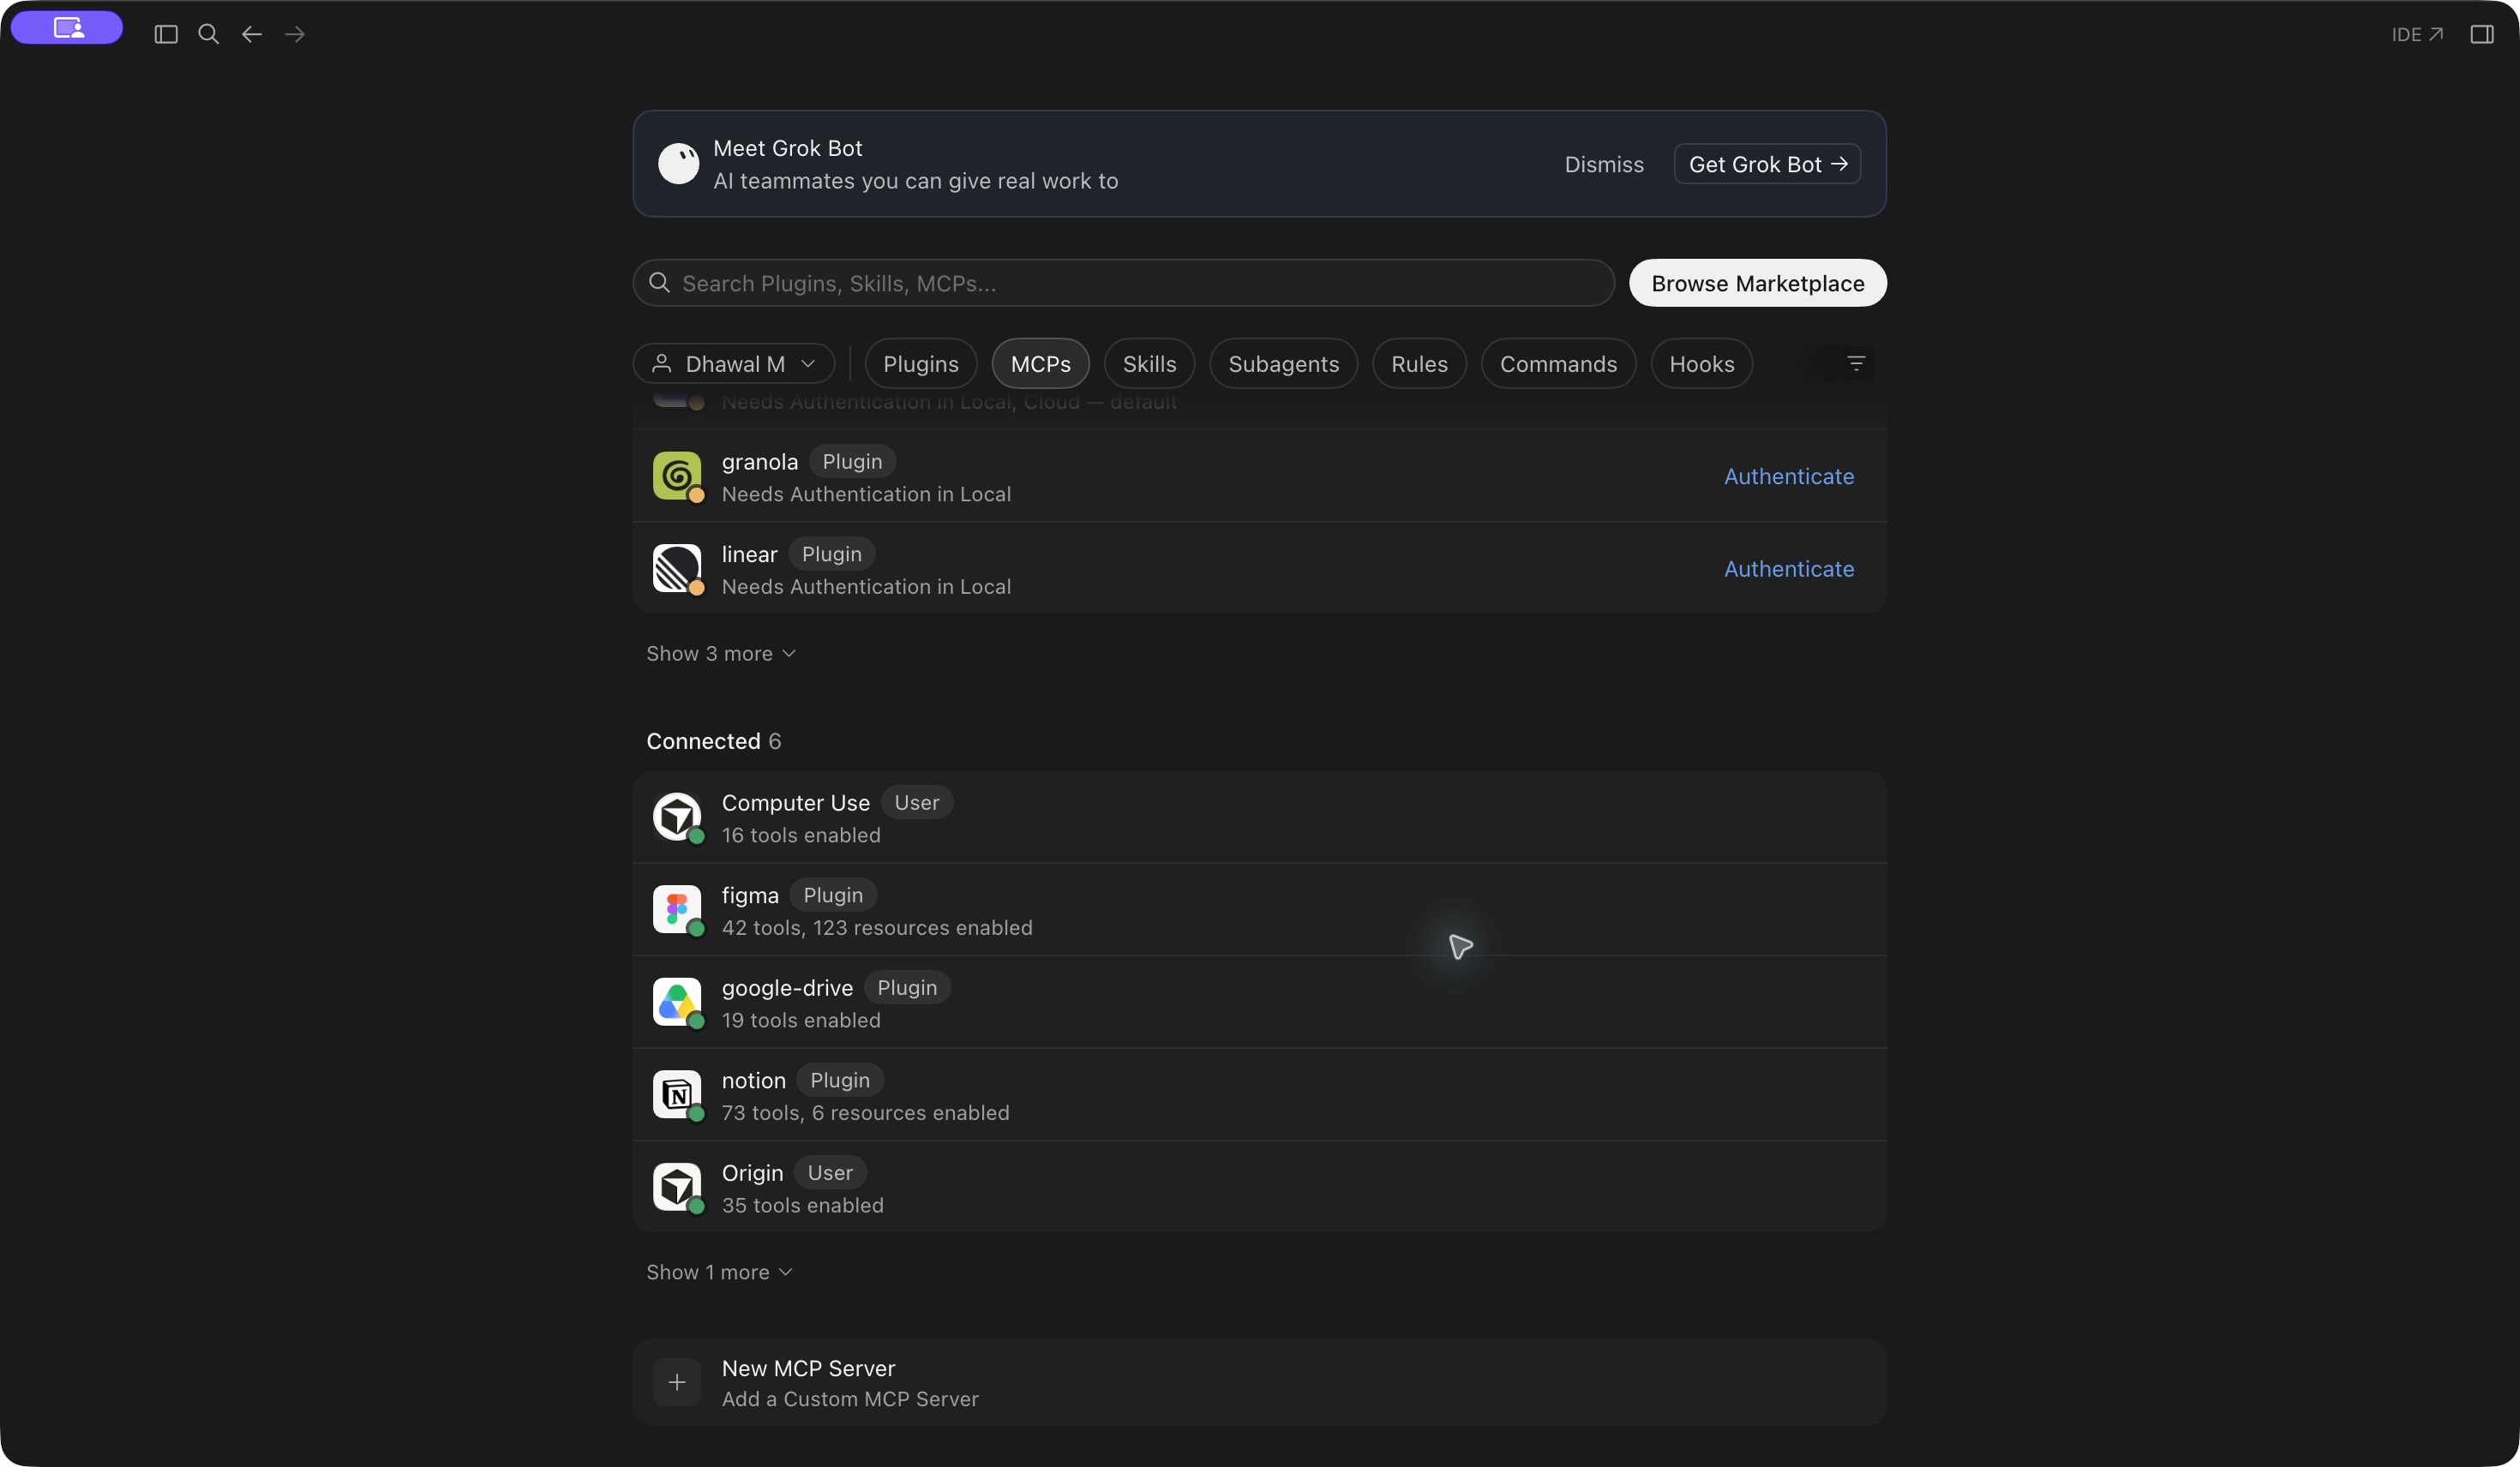
Choose New MCP Server to open the MCP configuration file. Merge the following entry into ~/.cursor/mcp.json for personal use, preserving any existing servers, then save the file.
{
  "mcpServers": {
    "mighty": {
      "url": "https://api.mightyai.app/mcp"
    }
  }
}
Sign in
Find mighty in Cursor's MCP settings and use its authentication action. Complete MightyAI browser sign-in and choose your workspace.
If sign-in asks for an unsupported automatic client registration method or stops before consent, contact MightyAI with your Cursor version and the error. Do not add advertising API keys as server headers.
Check access
Start a new agent chat with the MightyAI server enabled:
Try this request
A visible tool list alone does not prove account access. Once brand discovery works, try your first advertising review.
See Cursor's MCP documentation for configuration options.