---
title: Connect Claude
description: "Connect MightyAI in Claude using the plugin or a custom connector."
---
> **For AI agents:** the complete documentation index is at [llms.txt](https://mightyai.jamdesk.app/llms.txt). Append `.md` to any page URL for its markdown version.
Use your MightyAI account to connect Claude to your workspace and brands.
## Choose your setup
### Claude plugin
### Install the Mighty Ads plugin
If you have a Claude plugin ZIP from MightyAI, open **Customize → Plugins**, choose **+ Add → Upload plugin**, and select the ZIP. Keep the plugin enabled. Open its **Connectors** tab and connect `mighty`.
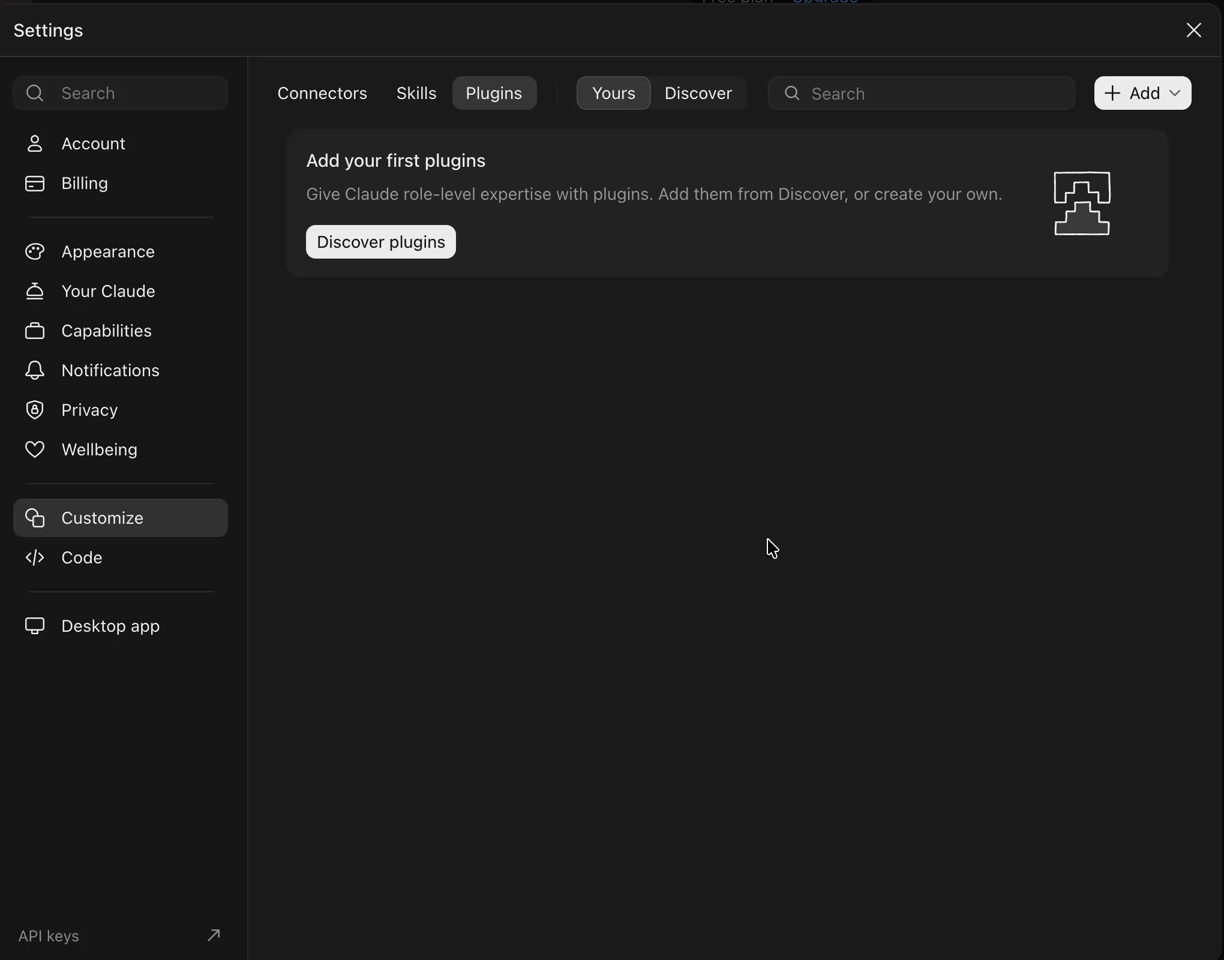 Need the plugin package? [Contact MightyAI](https://www.getmighty.ai/contact) for the current Claude download.
### Custom connector
### Add a custom connector
If you are setting up a direct connection:
#### 1. Open setup
Open **Customize → Connectors** in Claude.
#### 2. Continue setup
Choose **+ Add → Add custom connector**.
#### 3. Enter the connection details
Name it **MightyAI** and enter the server URL below.
#### 4. Authorize the connection
Choose **Sign in now** and **Use Claude's published identity** when offered. Finish adding the connector.
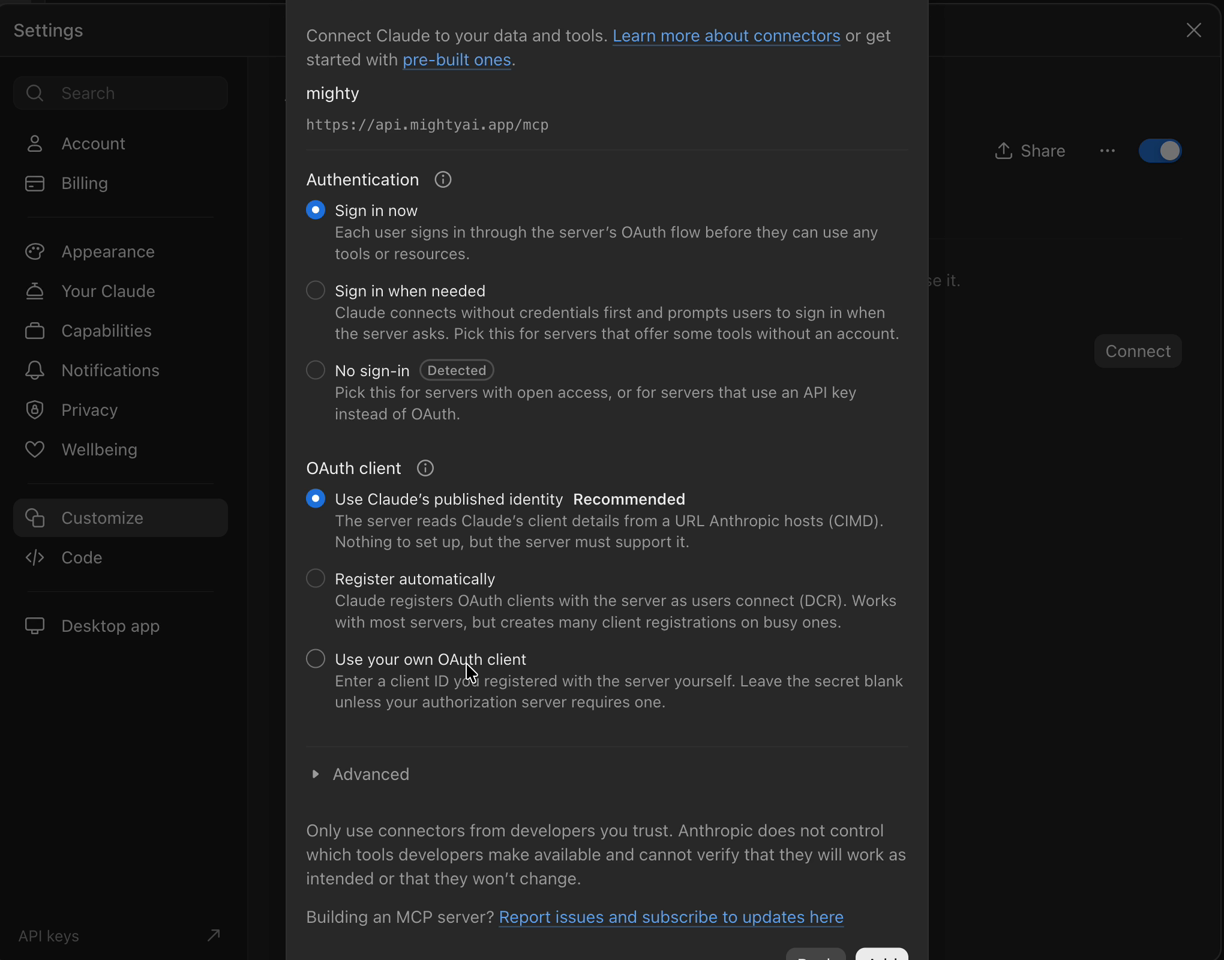 #### 5. Choose your workspace
Complete MightyAI sign-in, choose your workspace, and allow the requested access.
#### 6. Start a chat
Start a chat and enable MightyAI in the conversation's connectors.
```text
https://api.mightyai.app/mcp
```
Do not choose **No sign in** for account access. If you already have the matching connector, reuse it.
### Claude Code
### Connect from the terminal
For a direct terminal connection:
```bash
claude mcp add --transport http mighty https://api.mightyai.app/mcp
```
Run `/mcp` inside Claude Code, select MightyAI, and follow its authentication flow. A saved configuration alone does not establish authenticated access. See [Claude Code's MCP guide](https://code.claude.com/docs/en/mcp).
## Check the connection
Use MightyAI to list the brands I can access. Do not make changes.
Choose your brand, then try [your first advertising review](https://mightyai.jamdesk.app/quickstart).
If the wrong brands appear, disconnect and reconnect MightyAI in Claude's connector settings, selecting the intended workspace. Keep the plugin installed.
Claude's menus and availability can vary. See [Claude's custom connector guide](https://support.claude.com/en/articles/11175166-get-started-with-custom-connectors-using-remote-mcp).