---
title: Connect ChatGPT
description: "Add MightyAI as a custom MCP plugin in ChatGPT when your account supports it."
---
> **For AI agents:** the complete documentation index is at [llms.txt](https://mightyai.jamdesk.app/llms.txt). Append `.md` to any page URL for its markdown version.
Use the Mighty Ads plugin if MightyAI has supplied an installation link available to your account. Otherwise, the custom MCP setup below connects ChatGPT to the same MightyAI server.
Custom MCP setup depends on the controls available in your ChatGPT account. These steps do not require a public Mighty Ads marketplace listing.
## Add the connection
### 1. Open setup
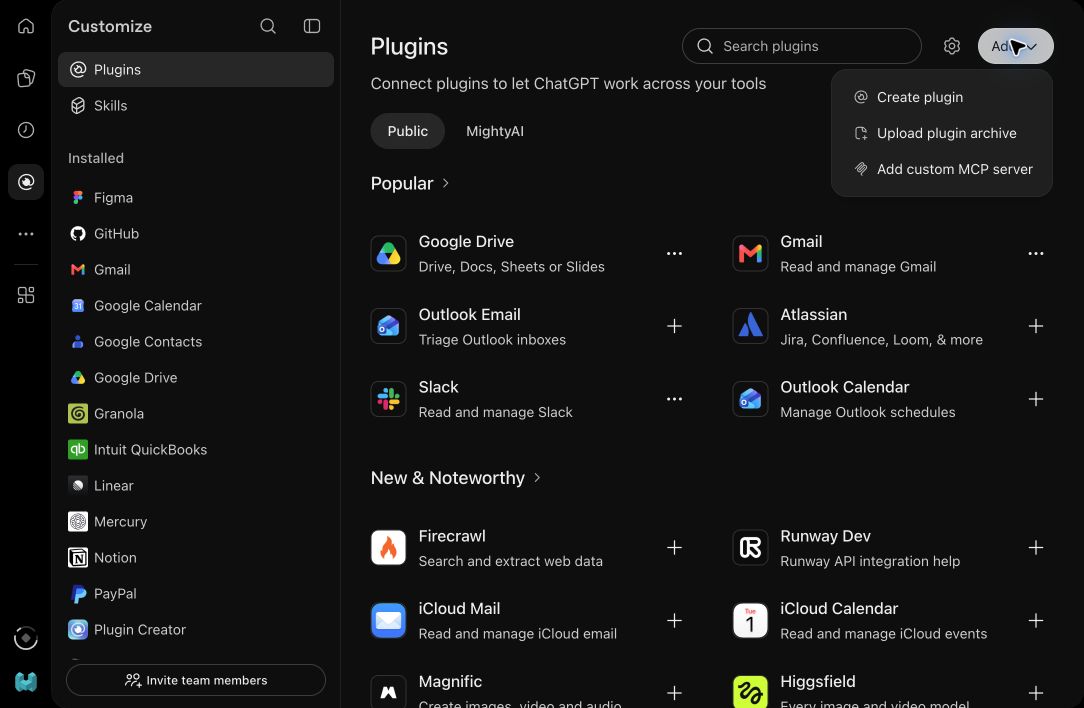
Open **Plugins** in ChatGPT’s sidebar, or open [ChatGPT Plugins](https://chatgpt.com/plugins).
### 2. Open the Add menu
Select **Add → Add custom MCP server**.
 ### 3. Enter the connection details
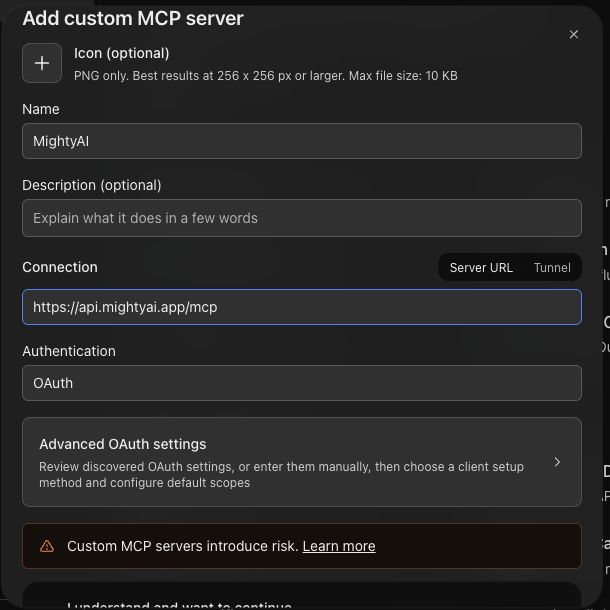
Name it **MightyAI** and enter this **Server URL**:
```text
https://api.mightyai.app/mcp
```
 ### 4. Check OAuth settings
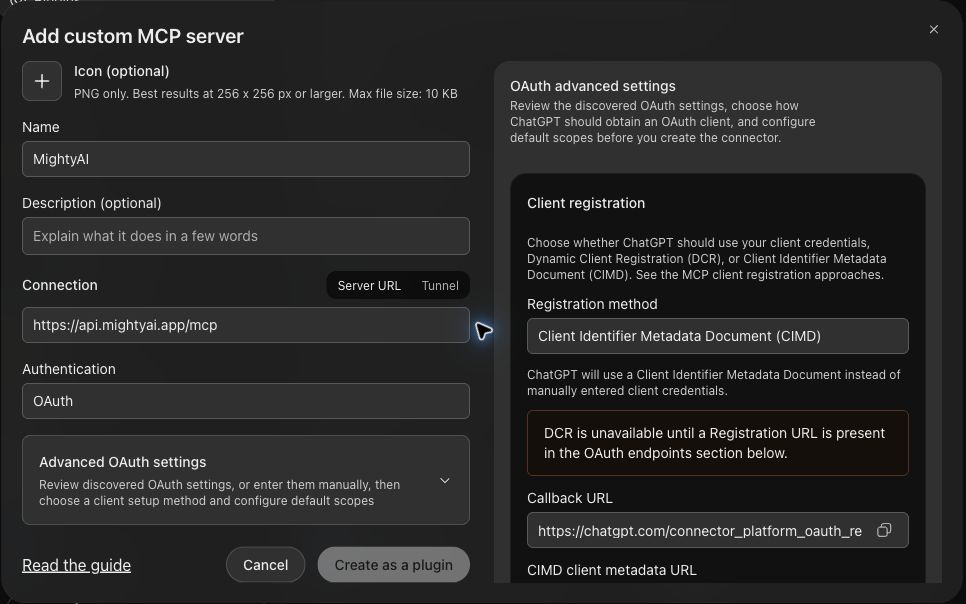
Keep **Authentication** set to **OAuth**. Open **Advanced OAuth settings** and check that **Registration method** is **Client Identifier Metadata Document (CIMD)**. ChatGPT can discover and select this automatically.
 ### 5. Check the result
Review ChatGPT's connection notice, select **I understand and want to continue** if you agree, then select **Create as a plugin**.
### 6. Choose your workspace
Install the resulting plugin and complete MightyAI browser sign-in. Choose the workspace containing your brand.
If your account does not show custom MCP controls, [contact MightyAI](https://www.getmighty.ai/contact) for an available setup path.
## Use it in a chat
Start a new chat, type `@`, and select your installed MightyAI plugin. Ask:
Use MightyAI to list the brands I can access. Ask which brand I want to use. Do not make changes.
Check the brand, then run [your first advertising review](https://mightyai.jamdesk.app/quickstart). Connecting ChatGPT does not connect your advertising accounts; add those in [MightyAI Integrations](https://mightyai.jamdesk.app/integrations/overview).
For updated menus, see [OpenAI's custom MCP setup guide](https://developers.openai.com/api/docs/guides/custom-mcp-server).